How to connect a Java profiler like VisualVm or JConsole to a remote tomcat running on Amazon EC2
I have been having some issues related to heap space in a tomcat that I have been running on an Amazon EC2 instance.
In order to analyze the problem I wanted to connect a Java profiler to a remote tomcat.
This is my environment:
Application server: apache-tomcat-8.0.24
Instance type: EC2 t2.micro with ubuntu 14.04
java profiler: VisualVm and JConsole
After reading different tutorials and trying different approaches which didn’t work, here is what it worked for me:
1. Set the environment variables for tomcat
If you don’t have a set environment (setenv.sh) file, create one. In your tomcat folder/bin: create a sentenv.sh file and add execution rights.
eg:
[Shell]
cd /var/local/apache-tomcat-8.0.24/bin
touch setenv.sh
chmod +x setenv.sh
[/Shell]
2. Choose a free port for JMX and set the JMX configuration
In the setenv.sh file that you have created in the previous step you will need to add the followind configuration to CATALINA_OPTS:
-Dcom.sun.management.jmxremote
-Dcom.sun.management.jmxremote.port= RANDOM_JMX_PORT
-Dcom.sun.management.jmxremote.ssl=false
-Dcom.sun.management.jmxremote.authenticate=false
-Dcom.sun.management.jmxremote.local.only=false
-Djava.rmi.server.hostname=localhost
In my configuration I have chosen randomly the 10005 as my jmx port, so my setenv.sh file looks like:
[Shell]
CATALINA_OPTS=”$CATALINA_OPTS -Dcom.sun.management.jmxremote -Dcom.sun.management.jmxremote.port=10005 -Dcom.sun.management.jmxremote.ssl=false -Dcom.sun.management.jmxremote.authenticate=false -Dcom.sun.management.jmxremote.local.only=false -Djava.rmi.server.hostname=localhost”
[/Shell]
*Note: Use CATALINA_OPTS instead of JAVA_OPTS. If you use JAVA_OPTS you will get a java.net.BindException: Address already in use.
This is because with this options JAVA_OPTS will try to start a jmx server when you start and when you shutdown tomcat. Nevertheless, if you use CATALINA_OPTS will only run when you start tomcat.
3. Restart tomcat
4. Find the Java server RMI port
When you start tomcat in the server, Java will open a TCP port for RMI calls.
This port by default is 1099 but every time you start a new Java process it will open randomly a different port.
This port is important because it will allow us to connect to the Java Virtual Machine in the server, and later on we will need to redirect it via SSH tunnel.
To obtain the port run the following command:
[Shell]
sudo netstat -lp | grep
[/Shell]

As you can see the jmx port is 10005 and the RMI server port is 45995.
5. Create a SSH-tunnel to the JMX and RMI ports
By creating a ssh tunnel we won’t need to add any security group to the ec2 instance and we will be able to skip the firewall.
In your local machine create a ssh tunnel to the RMI port and to your JMX port using the following command:
[Shell]
ssh -N -v -L 45995:127.0.0.1:45995 -L 10005:127.0.0.1:10005 ubuntu@ec2xxxxx.compute.amazonaws.com -i
[/Shell]
this will work for Linux and Mac users but if you are running under Windows you will need to use putty.
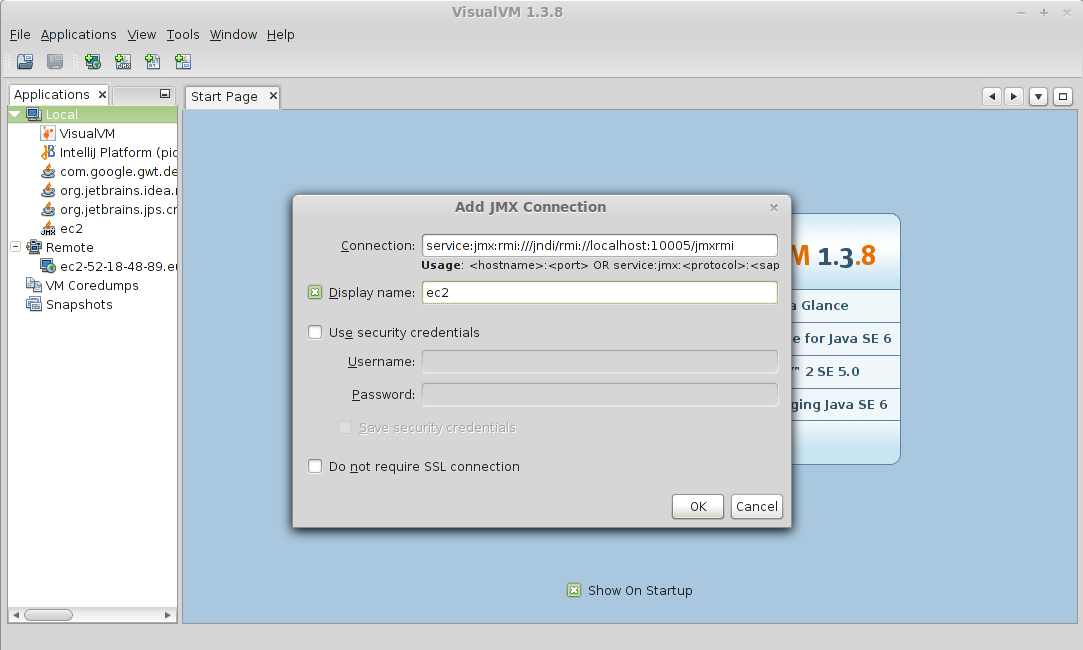
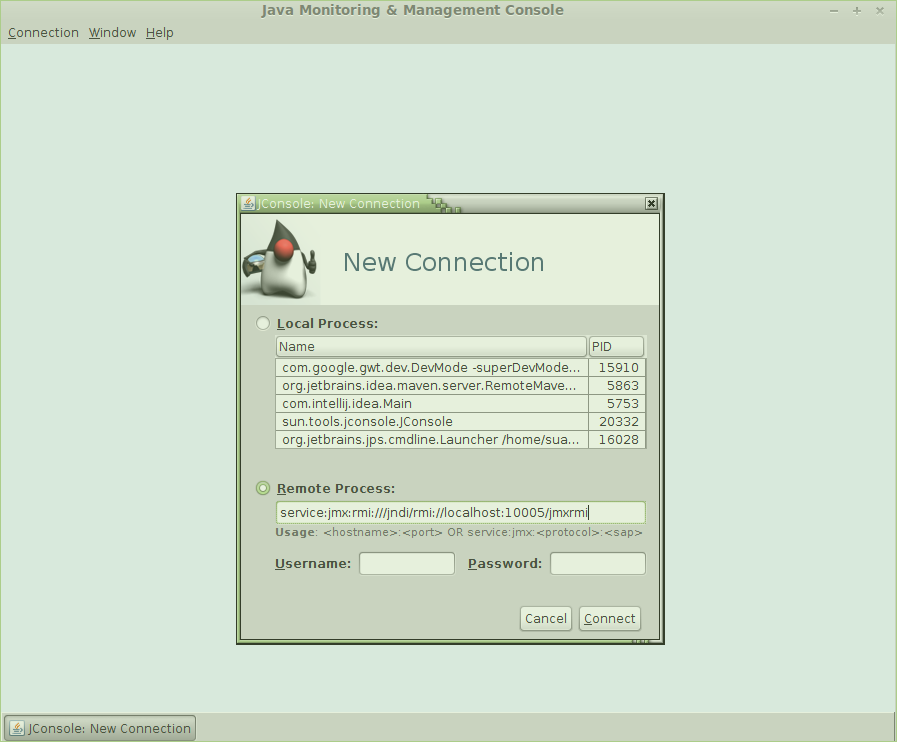
6. Launch the profiler
In Visualvm add a jmx connection using the following uri:
service:jmx:rmi:///jndi/rmi://localhost:10005/jmxrmi
or if you would like to use JConsole add the same uri in the remote field:
After all, you will be able to run a profiler an analyze your remote application.
Recent Comments